Tasty tasty YAHMS
I’ve mentioned a few times on recent blog posts about the Arduino project I’ve been working on to provide an internet controlled system for my central heating. I’m glad to be able to say I’ve finally got this working, but not only that, I’ve also opted to release the source code so that others can make use of it. The source code comes in two parts, the code to run on your Arduino and the code to run on the server side. I’m releasing both parts as Open Source Software as I realise that I’m not necessarily going to get time to add features that others need and by opening up the source code I can allow more people to get involved. I’ll be running the server side on yahms.net and will be letting anyone sign up to use the site. Right now that’s not hugely useful as new programs can only be added by inserting directly in the database but hopefully I or someone else will get around to knocking up some more UI and an API. I haven’t really mentioned what the site or the system actually does so I’ll give some brief summaries about the system and the hardware and then will be posting full build logs for all pieces of the hardware shortly.
A little more about the system in general then. I decided before Christmas that I wanted to be able to control my central heating from the Internet. What made me finally decide to do it was when I realised that my existing controller is simply plugged into a 3-pin socket meaning that all I needed to do was set the existing controller to be on constantly and then find a hardware solution that would allow me to get in between the 3-pin plug and socket to control the system. One of the things that made me decide I should build the system was the spate of cold weather we had. It seemed to come on all of a sudden so there was a number of mornings we’d wake up at 7am and find that because the weather was so cold the heating hadn’t been on for long enough. To solve this I decided I needed some intelligent temperature control that would turn the heating on earlier when we’re having a cold morning. A similar but different problem is when we go on holiday for a few days and come back to a cold house, with the heating controlled from the internet we’ll be able to have the heating fully off while we’re away but make it turn on a few hours before we get home.
So, the smallest part of the system is the temperature “probes”. Partly just to experiment with Xbee but also to get an idea for how the house retained heat I decided I wanted to put a few wireless temperature probes around the house. In theory they should be very simple just using an Xbee with a TMP36 temperature sensor feeding into them, in actual fact I’ve ended up with about 10 separate parts, most of which are there to make sure I get a steady regulated power source to the Xbee. Originally I had been hoping to power them from a battery-backed solar panel but in the end I’ve had to go with batteries.
To control my hall light I’m using a solid-state relay wired into the power line for the light. I had hoped to be able to make this non-invasive by wiring into the light switch but had difficulty getting the wire through the wall to the switch so ended up having to cut the line and re-connect it in a junction box which I could then wire up to my relay. The light is turned on by short-circuiting the two wires on this line and can be done either by turning my relay on or by using the existing switch. This means you don’t have to use the internet to turn the light on, but once the internet has turned it on you can’t turn it off locally, but that’s not a big deal.
To intercept the power to the heating I used an old mechanical timer with all the mechanics removed. This left me with a nice simple device which I only needed to short circuit two connections to turn on the circuit. A simple relay did the job here too and I had enough space left to add in a power module so that I can provide 5v USB power from it too, but more about that in the dedicated post. I can leave the existing heating controls set to “Constant” so that as soon as I turn the socket on, the heating comes on too.
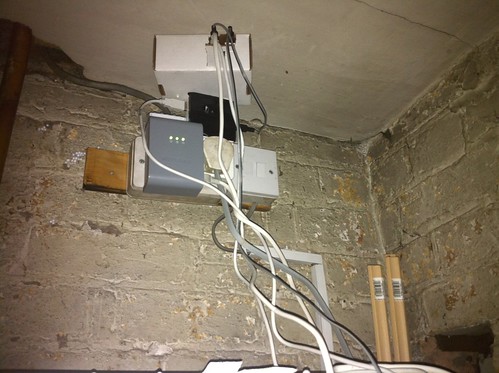
Finally, to control the two relays and receive signals from the Xbee modules I put together a simple Arduino shield. It has an Xbee module connected to receive the signals, some wired jacks to send signals to the relays and also a temperature sensor, just “because”. The Arduino also has an Ethernet shield so the software is able to download configuration from yahms.net and turn the relays on and off in response to that config, it can also submit sensor readings back over the connection too.
So that’s the general overview, I’ll go into more detail in the next few posts and talk more about the software as well as the hardware and what they’re both capable of.
Comments
— Frankie Roberto
— john
— Ken Boak
— Ken Boak
— Ken Boak
— Paul Tanner