Hacking Location into Hardware
UPDATE 2011/11/16: It’s now possible to buy a mapme.at WhereDial “Weasley Clock” just like this one!
Last weekend I went to the Howduino hack day which by good fortune was happening on my doorstep, in Liverpool. The day was organised by two friends of mine - Adrian McEwen and Thom Shannon - who have been doing hardware hacking for quite some time now and wanted to open things up for more people to get involved.
The day was partly named after Arduino (with a bit of Scouse humour mixed in - “how do we know?!”). From their website:
Arduino is an open-source electronics prototyping platform based on flexible, easy-to-use hardware and software.
Basically you get a circuit board that has a USB slot, a power slot and a set of digital and analogue inputs and outputs. You can load software onto the circuit board via the USB slot, the software can then run on the board when it is disconnected from the computer and can operate other hardware through the inputs and outputs. Adrian used one of these devices to make the famous Bubblino twitter monitoring bubble machine and the Mazzini power monitoring project. Thom has used it to make, amongst other things, a light tracking mini.
Though Howduino got its name from the Arduino boards, the day was actually more of a general hardware hacking event. Sophie Green spent most of the day making artworks using “brush bots” which were incredibly simple devices made from motors and batteries mounted on toothbrushes. Some people built a “drawbot” from scratch on the day and a few people tried making racing radio controlled cars with movements controlled by twitter hashtags.
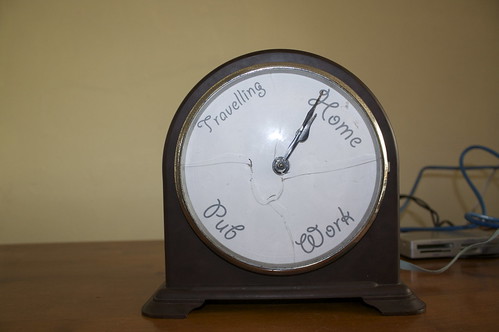
My project was suggested by Grant Bell, he thought that I should use mapme.at to create a “Weasley Clock”. This clock is described in the Harry Potter books by J.K. Rowling, it is used by the Weasley family to see where each member of the family is. Instead of telling the time, each hand shows a photo of one of the family members, the clock face has a number of locations written around the edge, such as “Home”, “Travelling”, “School”, “Holidays” and even “Mortal Peril”!
Now one way in which I could’ve handled this would be to create a web page that showed my location on a picture of one of these clocks. That would be fairly easy to do but much less interesting than the hardware hacking version. I started off by getting hold of an old clock. My Dad has been tinkering with and fixing clocks for years, and often gets given old clocks and told “This stopped working years ago, thought you might like it” so fortunately he has a few lying around and gave me this one:
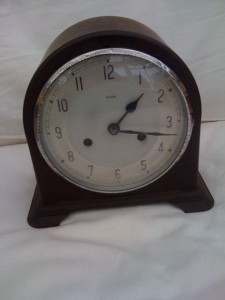
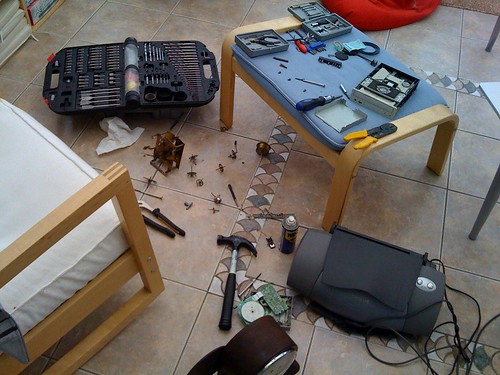
I spent a morning taking it to pieces carefully and working out how it worked, until I pulled the back off it and the chime spring caused an explosion of gears:
I then took all the bits to Howduino together with a stepper motor that I’d taken out of a floppy drive. After a short while working with Aaron from Oomlout we managed to get the stepper motor going but then I had the problem of connecting the motor to the clock. After many hours of trying to glue and solder the small stepper motor on I finally decided to ask around to see if anyone else had stepper motors. Fortunately someone did, a much bigger motor that could fit through the black of the clock mechanism and unbelievably had a gear on that meshed perfectly with the gears in the clock. With the application of some super glue and a few pieces of metal “salvaged” from an old printer I got the motor attached and turning the hand reliably:
Once that was done I had to write some software. The software for moving the clock is fairly simple. As the motor is a “stepping” motor it can be controlled very reliably. One step of the motor moves it by a well defined amount, with the gearing from the clock 150 steps of the motor turns the minute hand around in a complete rotation, meaning 12 × 150 = 1800 steps will turn the hour hand around completely. I knocked up some Arduino code that reads the current location of the hands from the EEPROM memory on the Arduino. To reset it I manually move the hands to “midnight” and zero the EEPROM memory. I can then tell the Arduino to position each of the hands by an hour. As the hands are still geared together I can only put the hour hand between one hour and another, while the minute hand can be precisely positioned. When the clock has moved to the position you’ve requested, it saves the new location of the hands to the EEPROM memory again so that it’s safe to be powered off.
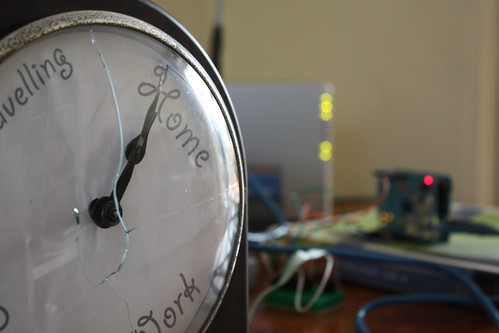
To get my location I’ve knocked up a MapMe_At class which can request the location for a user. It makes a HTTP request to mapme.at, using the Arduino Ethernet Shield, pulls down the location and uses a very lightweight JSON parser to pull out the label for the favourite location that I’m currently at. From my core code I then request the location of two users from mapme.at every minute, convert that location to a position on the clock and then move the hands. When it works it looks really good, I’m only running the clock forwards at the moment because some of the gearing for the chime is still there and makes funny noises if I run the clock backwards, this means that it can take nearly a minute for the hands to move but considering it’s unlikely for location changes to happen that often this should be fine. I do seem to have a problem whereby the clock stops working after running for a while so I’ll have to do some debugging, but as you can see from the photos and the video it is looking pretty good at least!
(Unfortunately hardware hacking can have its casualties, as you can see the glass on the face of the clock was one)
I’ll be taking the clock along with me on the next Tech Bus Tour from London to Liverpool. I’ll be updating the face to show our progress between the locations as this should be more interesting than showing that I’m “Travelling” constantly. I’ll also open source the Arduino source code when I get around to tidying it up.
UPDATE 2011/11/16: It’s now possible to buy a mapme.at WhereDial “Weasley Clock” just like this one!
UPDATE 2009/01/04: The code is now available on github, I haven’t had time to fully clean it up and add comments throughout but hopefully it’ll be useful anyway. Download the code here.


Comments
— Interesting Location/Clock Mashup « blog.mapme.at
— danny
— danny
— Stuart
— john
— The location clock | Diy all the Way
— The location clock | SquareCows
— Shop Club Blog » Blog Archive » The location clock
— Stewart
— john
— Stewart
— The Weasley Clock and Google Latitude a mashup waiting to happen | edparsons.com
— Computing, GIS and Archaeology in the UK » Out and about
— Till
— mipi
— GoodGNUs » Blog Archive » Cool Arduino Projects
— Video Sunday: Goblin Roller Derby Clocks With a Side of Meatballs « A Fuse #8 Production
— Building the Internet of Things – Arduino and Ethernet | Manchester Digital Laboratory
— Building the Internet of Things – Arduino and Ethernet (IOT)02 | Manchester Digital Laboratory
— Building the Internet of Things – Arduino and Ethernet (IOT)03 | Manchester Digital Laboratory
— markfrances.co.uk » Link : This is a clock that displays the location of a person and uses the Arduino software to collect the data.
— Building the Internet of Things – Arduino and Ethernet | Manchester Digital Laboratory
— Blog What I Made » WhereDial Ready to Ship
— Whereabouts Clock: DIY Wizardry, No Wand Required - Geek Magazine